
Welcome to Paria's “Hike of the Week” series. These posts highlight some of the best trails the world has to offer. For us, reading about and seeing pictures of an awesome hike inspires us to want to see it ourselves. We hope this series does the same for you!
This week, we are highlighting the Devil's Dome Loop in Washington.
Featured Photo: Sunrise on Jack Mountain (photo by Ryan Wike)
Why Hike Devil's Dome Loop?
This loop is located near the Canadian border in the breathtaking Northern Cascades. The trail circumnavigates Jack Mountain. With the ample increase in elevation, this means you get sprawling views of the surrounding mountain range. Devil's Dome Loop passes through two of the area's prettiest wildernesses: Ross Lake National Rec Area and the Pasaytan Wilderness. This quintessential Northern Cascades hike offers all the beauty this majestic area has to offer.
- Length: 38.5 miles
- Difficulty: Strenuous
- Elevation gain: 10,500 feet
- Best time to visit: July-October
- Highlights include: Glaciers, snowy cliffs, alpine meadows, Ross Lake, Spratt Mountain, peaceful evergreen forests, crystal clear creeks, impressive sunsets and sunrises, sprawling views of the Northern Cascade Mountains
- Most hikers seem to prefer hiking counter-clockwise. But, going clockwise lets you get some more warm-up time for the strenuous climbs.
- The large amount of elevation gain makes for incredible views along much of the trail.
- There are some established campsites along the route. But, you can also disperse camp once you are in the Pasaytan Wilderness.
Before packing your bags, keep the following in mind:
- The two wilderness areas this trail traverses have different backcountry permit regulations. See the “Do I Need a Permit?” section below.
- Unfortunately, break-ins are not uncommon at the trailheads. Don't leave anything valuable in your vehicle!
- Black bears are common in the area. Remember to make noise occasionally to avoid any accidental run-ins!
How Do I Get There?
If you are flying in, the Seattle-Tacoma International Airport is the closest major terminal. From here, follow signs for and merge onto WA-518 E. Keep on this for about 1 ½ mile before keeping left to get on I-405 N. Continue 11 miles. Take Exit 11 to merge onto I-90 E. Continue 76 miles. Use Exit 85 to get on WA-970 N. Continue 10 miles before the road turns into US-97 N. Keep going another 35 miles. Follow the signs for US-2 E/US-97 N. Continue 52 more miles. Make a left onto WA-153 N and drive 30.7 miles. Continue onto State Route 20 W. Drive 65.6 more miles before reaching the trailhead parking on the right.
Map of Recommended Route
The following map outlines our recommended route. For even more detailed mapping, including being able to print a copy for yourself, click the "Open in CalTopo" button at the top of the map once it's loaded into view.
- Day 1 - East Bank Trailhead to Devils Creek (11.5 miles)
- Day 2 - Devils Creek to Devils Park (17 miles)
- Day 3 - Devils Park to East Bank Trailhead (10.5 miles)
Trail Description
Day 1 - East Bank Trailhead to Devils Creek
Start your first day off relatively easy in a rolling forest full of towering pines. After a few miles, you'll pass over the Devils Creek gorge suspension bridge. This opens up to the trek along the lake.
The next several miles are right along Ross Lake. And we do mean right next to it. Lose your footing and you might be going for a swim! The scenery is stunning, though. The mountains rise behind the lake to one side. The quiet pine forest still offers sanctuary to your right.
Soon, you'll come to the Devils Creek campsite. Water (other than the lake) can be tricky to find along this trail. That makes this a great spot to stop overnight. Devils Junction is also a popular camping area nearby. It is right next to the lake. Keep in mind you will need permits for either of these camps.
Day 2 - Devils Creek to Devils Park
Don't forget to filter some more water before heading out! Hopefully you slept well as day 2 is a long one. It's a steep, grueling climb up to Devils Dome within the first several miles. There are lots of slight switchbacks, which can feel tedious after a while. Fortunately, the elevation gain also means the views open up after a few miles. These grant your first sights of Jack Mountain. Keep a lookout out for its Nohokomeen Glacier too.
Hopefully the amazing views keep you motivated as you climb several more precipitous miles before reaching the top of Devils Dome. It's arguably the best view of the trail up here. You'll be able to see why some people opt to camp up here. The sunrises and sunsets are amazing. At the very least, take a well-deserved break, eat lunch, and soak up the views.
From here you'll descend Devils Ridge. Continuing on the Jackita Ridge Trail, the great views continue. The meandering mountains roll into the distance and evergreens dot the lower elevations. Things get rocky too with steep, sketchy scree slopes. Cover a couple more miles over tricky (and exhausting) up and down terrain before finally reaching the beautiful meadow at Devils Park.
Day 3 - Devils Park to East Bank Trailhead
You'll find yourself in the forest again on your last day. The scree slopes are behind you. But, there are some steep switchbacks to deal with as you finally descend towards the trailhead. Pass through more meadows at Macmillan Park. Keep an eye out for a waterfall below Crater Mountain.
Before long, you'll hear the traffic from Highway 20 once more as the trail parallels the road for several miles. The walk back to your car is pretty smooth sailing after the strenuous roller-coaster of the past couple of days!
What Will I Need?
Average highs range between 51° and 74°F between July and October. Lows range between 32° and 42°F. Again, these are just averages. It can get downright cold at night, so a trusty down sleeping bag is a must for this trip. A good sleep system is integral for staying warm at night. So, be sure to bring a quality sleeping pad too. This trail will tire even the fittest hiker. Consider taking a pump bag to air your pad.
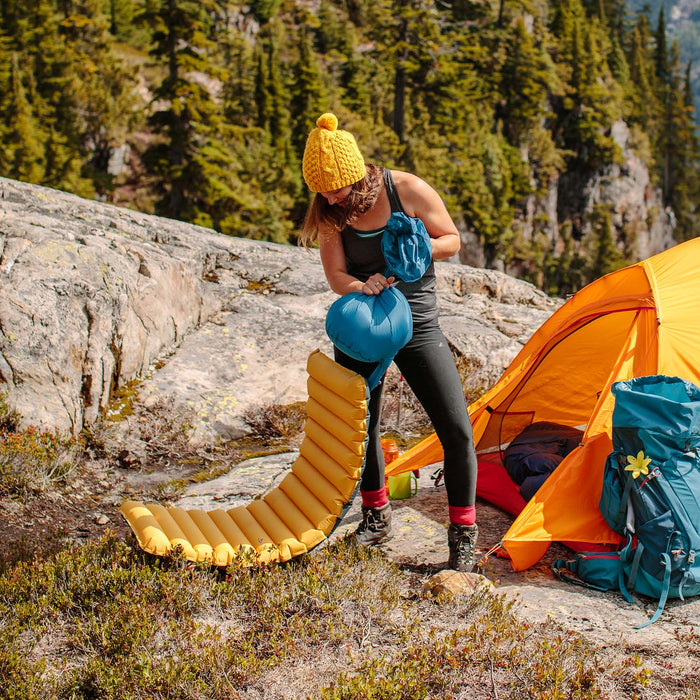
A lightweight, insulated sleeping pad can make for a comfortable night on the trail. To save your lungs at the higher elevations, consider getting a pump sack as well.
A lightweight, insulated sleeping pad can make for a comfortable night on the trail. To save your lungs at the higher elevations, consider getting a pump sack as well.
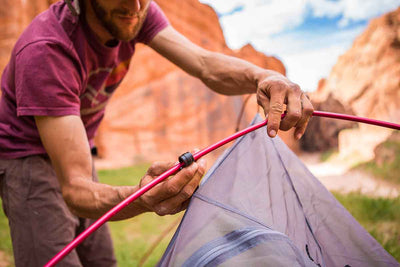
SHOP NOWYou'll likely want a lightweight, but durable, tent for this trip. This will add protection from rain/snow and chilly nighttime temps. If you're using trekking poles, have them do double duty with a trekking pole tent.
There are food lockers at some stops. It's still a good idea to bring a bear bag, though. (And be sure to know how to hang it!)
If there's anything else you need to complete your pack, visit our full line of high-quality, affordable backpacking gear.
Shop Backpacking Tents
Shop Ultralight Tarps
Shop Backpacking Quilts
Shop Down Sleeping Bags
Shop Insulated Sleeping Pads
Shop Backpacking Pillow
Shop Folding Trekking Poles
Shop Titanium Cookware
Shop Tent and Tarp Accessories
Finally, to make sure you don't forget something at home, use our Ultimate Backpacker's Packing List. It even includes a convenient printable checklist!
Do I Need a Permit?
Yes. The North Cascades National Park section requires permits. So, you will need at least one for the first night. You can find more info on them in the “Resources” section below.
Resources
North Cascades National Park Backcountry Permit Info
Washington Trails Association-Devil's Dome Loop
Conclusion
For a challenging, but worthwhile, hike to experience the beauty of the Northern Cascade Mountains, look no further than the Devil's Dome Loop!
Have you completed this trail or any others in the Northern Cascades? We'd love to hear about your experience in the comments section below!
Read Next
If you're looking for more hike ideas, read our “Top 10 Best Backpacking Trips in Washington State” round-up post. Also, the following Hike of the Week articles cover other great trails in the region.
Hike of the Week: Stein Valley Traverse
Hike of the Week: Juan de Fuca Trail
Hike of the Week: Three Sisters Loop
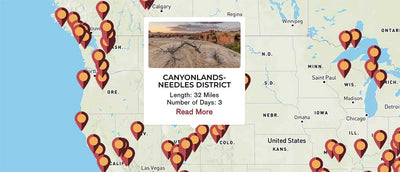
For even more amazing backpacking trips, visit The Trailhead, our interactive hike map. It contains a curated list of dozens of hikes, each with a detailed write-up like this one.

Finally, check out our comprehensive list of backpacking articles that cover just about everything there is to know about backpacking. If you're just starting out, our Backpacking 101 section covers all the basics. If you already have a few trips under your belt, you can find more advanced topics covered in our Expert Articles.


Leave a comment