
The sun is setting and you’ve hiked quite a distance. It’s time to pitch the tent and wind down with a hearty meal. What’s for dinner? Read on to find out our tips for making the most of your evening meals on the trail.
STICKS AND STOVES
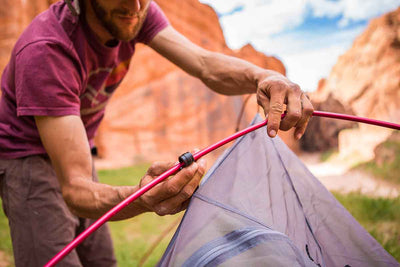
After a long hike, it is time for that warm hearty meal. Once you’ve settled down and pitched the tent; you could now start to prepare for dinner. How do you go about this? Do you light a campfire or bring out your backpacking stove?
Starting a campfire is one of the first things you learn when camping. You could use the dried twigs and branches from around the campsite to start a fire. All you would need is to carefully set up the fire pit and something to light it with.This means fewer things to carry around on the hike. Although camp regulations and weather conditions could be an issue. There are parks and campgrounds which do not allow campfires for environmental reasons. Even if they do, rain could prevent you from gathering dry wood or starting a fire.
On the other hand, you could simply lay down the camping stove and cook your meal in relatively no time at all. This means that you need to carry the portable stove and fuel. That’s several pounds added to what you need to carry, but setting it up and cooking would be much simpler. Plus you will be getting a stronger and more consistent flame without the smoke.
As far as safety and environmental issues are concerned, camping stoves are safer and have less impact than campfires. They are safer because once you turn the burner off, it’s off. On the other hand, even the smallest cinder from a campfire could still start a forest fire.
All in all, we suggest bringing a portable backpacking stove over a campfire. They are safer and more convenient, plus you would have more time to enjoy your meal rather than fussing over the flame.
WHAT TO BRING
Once again we go back to the 3 “C”s of camping food. COMPACT, CONVENIENT AND CALORIES. Always think about the most number of calories per ounce of food (including the packaging) in small and if possible, reusable containers.
You may also consider the food’s shelf life. Now is the time to check the labels and make sure that the food will stay for a long time. Avoid products that require refrigeration and plan your meals with the heavier and more spoil-prone food being consumed first. Dehydrated or freeze-dried foods are perfect for this. They are easy to prepare foods that have quick cooking times where you simply need to add hot water. Just make sure to try them out first before deciding to pack them for your hike.
Speaking of taste, you could bring spices, dried herbs or condiments to add flavor to your food. Look for the small packets of these items so that you would not need to bring the spice rack. Likewise, adding flavor to your water will make it more enjoyable. Sort of like a reward for a good hike. We suggest chocolate milk powder or tea packs. Unlike breakfast, lay off the caffeine so that you can get a good night’s sleep.
THE MENU
Here’s a list of dinner suggestions that are easy to prepare, loaded with energy, taste great, but still light to pack. Many of these can be found at your local grocery store or outdoor goods store. Make sure to check out the bulk food sections of many natural grocery stores. They may contain many different types of beans, rice, pasta, etc. and you can purchase exactly the amount that you need.
- Tortilla Wraps
- Summer Sausage
- Tuna
- Hard Cheeses
- Instant ramen or rice
- Pasta
- Dehydrated beans or chili
- Spice or Condiment Packs (Mustard, Ketchup, etc.)
- Chocolate milk powder or tea
- Dehydrated Meals from Mountain House or Backpacker’s Pantry
- Some sort of hard candy or chocolate if your have a sweet tooth
HOW TO PACK
How you pack your meals could make or break the entire trip. Here are some tips on how to compactly and conveniently pack the most amount of calories:
- Look for food items that come in packaging that you could eat them in. This saves you time and the need to bring plates or mugs to transfer them into before eating.
- If the items you need are not available in small containers, repack them into small ziplock bags.
- Group your food by meals and day. This way you would not need to take everything out of your bag and have easy access to just what you need. It will also make it easier to check if you are getting enough calories during any part of the hike.
- Remember: leave-no-trace backpacking, if you pack it in - pack it out. Bring a large ziplock bag to use as a trash bag and responsibly pack out any waste that you brought into the hike.
- Let’s keep the trails and parks clean so that future hikers will be able to experience the same unspoiled wilderness.
- Do not forget your large waterproof stuff sack to store and hang your food for the night. This will keep bears, critters, etc. from eating your food while you sleep.
For more ideas on how to pack your hiking food, check out Breakfast on the Trail and What to Eat While Hiking.
Resources
Meal Planning for Backpacking
Best Lightweight Backpacking Food
5 Food Tips for Camping and Hiking


For meals I like the convenience and savings of Freezer Bag style of cooking. I can make and mix everything at home the way I like it , then Zip Lock it in a pint freezer bag. In camp I get the correct amount of water to near boiling and add it to the bag. Stir and put the zip lock in a cozy to complete the cooking. When it’s ready I enjoy a home made meal. When finished the clean up is simply licking the spoon and putting the empty zip lock in the trash bag. The 1st zip lock becomes the trash bag for the others. My stove can burn a combination of fuels , either wood , alcohol or fuel tabs. Plus with an adapter ( burner ) it can use propane or butane. A firebox titanium Gen 2 Nano with the X box.
Leave a comment